Advanced methodology of CMM data utilization
The CMM performance and its effectiveness for process control depends on achieving the obvious goal of assuring the absolute accuracy of measurements and purpose of attaining the ability to recognize and control dynamics of the machining process. The MICRONITE approach for this process control with CMM is different from the one which is used by statistical (SPC) software. MICRONITE has three major focuses. First, a variety of engineering models are developed for real-time and off-line data analysis. Assurance of extremely low risk of quality acceptance and process control errors is absolutely necessary to benefit from massive amounts of CMM data. Second, MICRONITE addresses the needs of tool-centric control of the machining process. Along with the grouping of characteristics by finishing tools, the system determines the capability of form and single-point tools to hold multiple tolerances. Third, measuring and machining metrology is included into the knowledge-based control system. There is significant consideration of elimination of excessive measuring errors and form variation that would be detrimental for the ability to correctly certify product quality and provide preventive zero-defect process control. The outcome is a broad-based plan for the best utilization of modern CMM equipment.
MICRONITE has the resources to improve game-changing CMM performance – and the confidence to act when the machining process has indeed gotten out of zero-defect control. The system defines a state of control which applies a controllability of cutting tools as oppose to the erroneous SPC dogma which requires the quality characteristics to be in a state of statistical control. MICRONITE offers a path to zero-defect, and a cost-efficient process with less dependency on the operator’s gut feeling and engineer’s busy schedule. The biggest returns come from the innovative advances in intelligent data analysis and predictive decision making, which are available in MICRONITE.
Companies are spending millions of dollars to train their employees in SPC hoping the outcome will be a better use of CMM data and risk-free zero-defect control will be easily achieved. Ironically, there has been very limited use of statistical techniques for CMM data analysis. With obvious failures of conventional SPC can be attributed to attempts of imposing a machining-blind methodology onto operators and engineers.
New ways of machining control by MICRONITE are the only avenues available to reach higher levels of continuous improvement. Predictive modeling and tool-wear simulation remove a mismatch between the mechanics of machining and statistical data interpretation.
The achievement of potential benefits depends on provision of cross-functional MICRONITE-based communication between process engineering, quality, and production. MICRONITE’s Artificial Process Manager demonstrates capabilities to perform massive CMM data interpretation to adapt
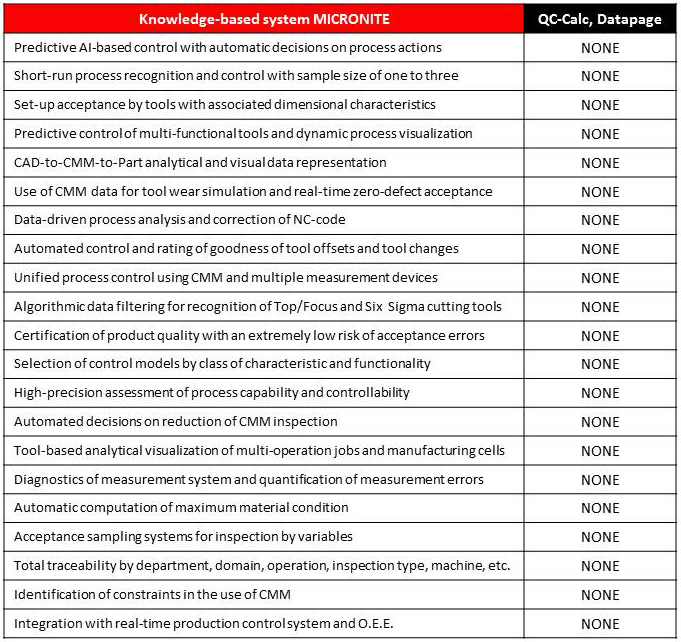
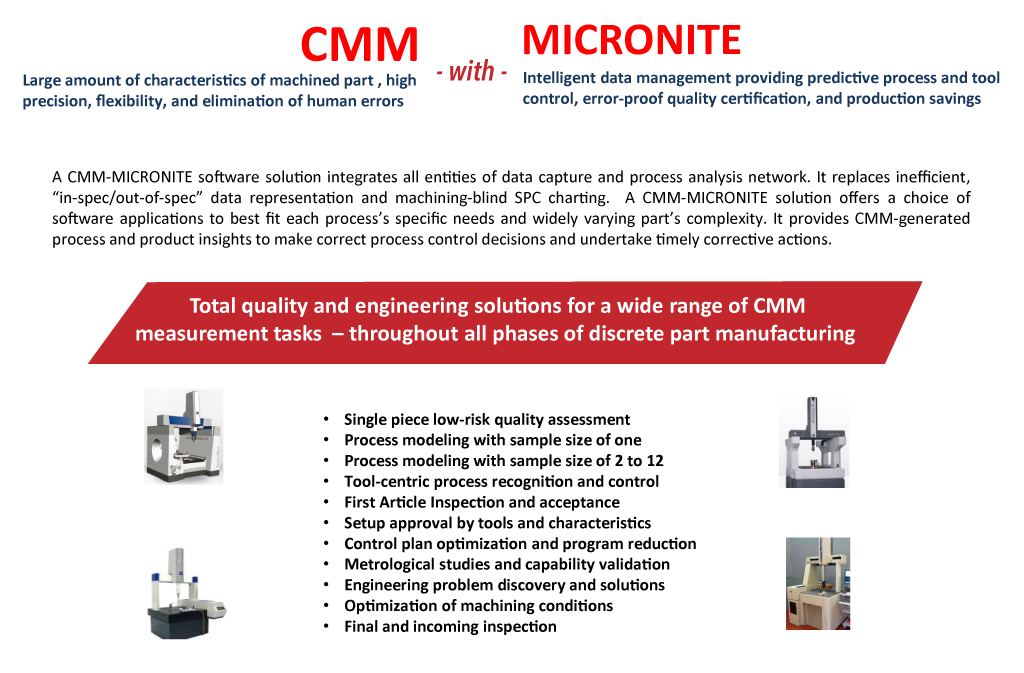
Capabilities of CMM – MICRONITE High Quality Software
CMM – MICRONITE The Scope of Development
• Building a foundation for all CMM-based initiatives. CMM data can serve as a platform for predictive modeling, quality forecasting, and process optimization. It needs to be flexible and cost-effective
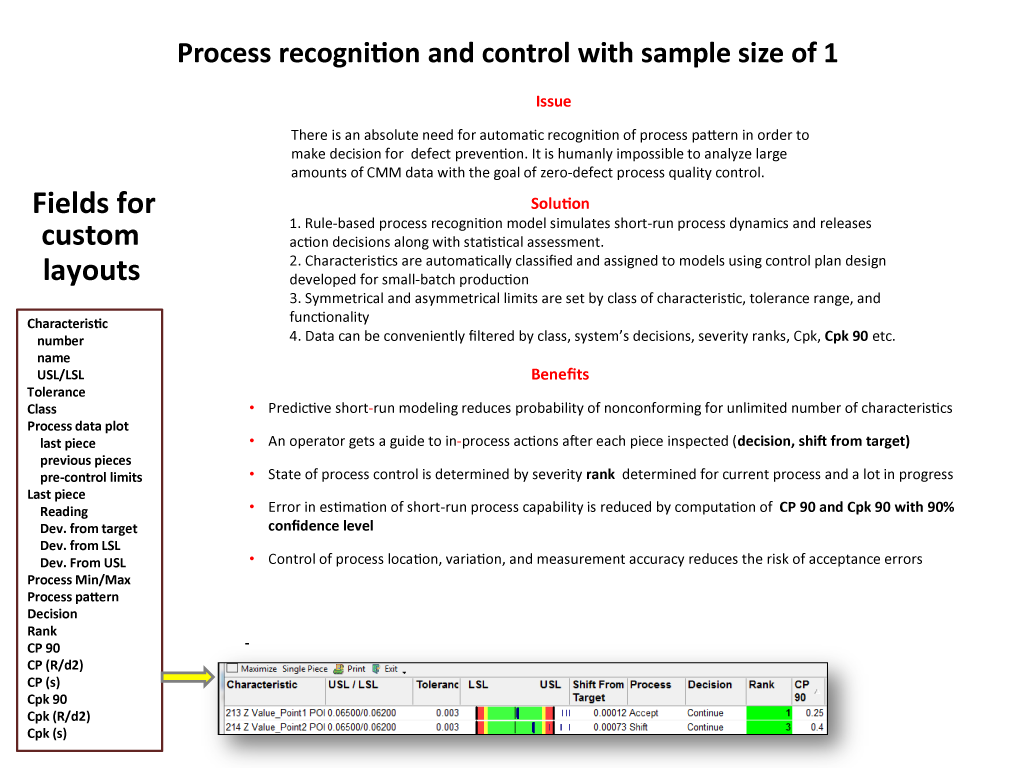
• Developing new-generation short-run models for tool wear simulation and zero-defect quality assurance. Automating CMM data analysis with decisions on process actions and clear visualization of operation dynamics
• Minimizing unnecessary quality costs. Reducing inspection time by creation of short CMM program and development of predictive models with sample size of one, two, and three. Software should help eliminate costly mistakes in data interpretation
• Keeping a close eye on necessity and accuracy of process adjustments and tool changes. Performing detailed statistical analysis of actions outcome
• Meeting compliance with customer specification. Reducing risk of rejects and providing customer-required quality documentation and inspection records
• Simplifying process optimization using knowledge-based interfaces
• Creating measurement assurance protocols for validation of CMM data accuracy
• Boosting production capabilities and capacities with improved CMM usage
The main benefits of CMM-MICRONITE system
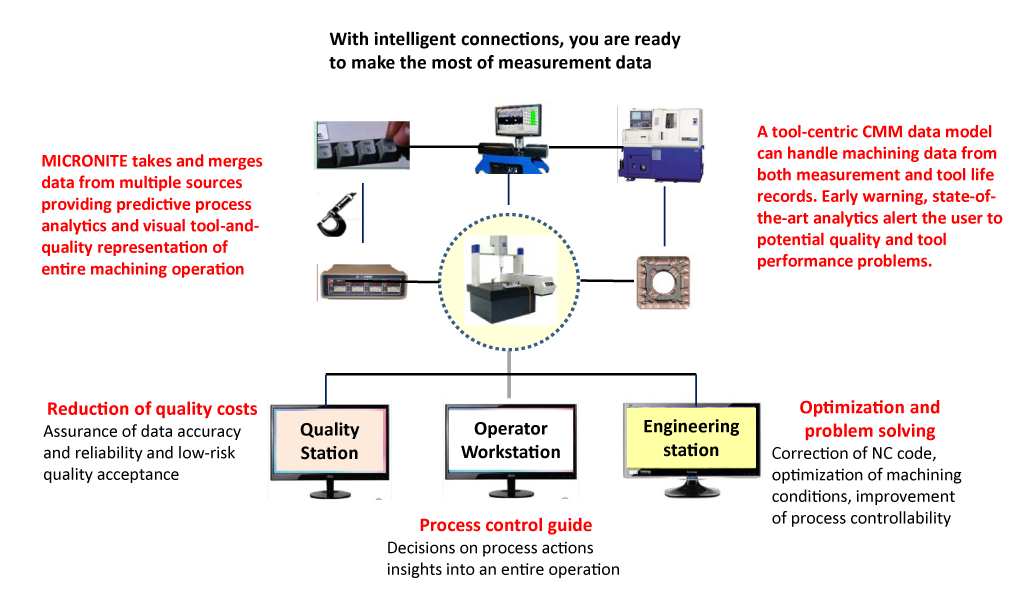
• Get the overall process picture by tools and characteristics. Get fast process insights by viewing the results of CMM data analysis performed by the knowledge-based system. Take actions based on MICRONITE decisions. Visually, in just seconds, you can spot problems with tools, identify key difficult-to-control characteristics, and uncover insights that would otherwise stay hidden
• No matter the size of production batch – or single-scan data volume – you can see all process and quality information quickly and easily. Knowledge-based data visualization software lets you make more precise decisions faster than ever before
• Go to really intelligent data utilization by reducing process variation and uncertainty in product quality. The next step is to move to eliminate scrap and rework
• Explore CMM data through MICRONITE’s analytic visualizations with the purpose of substantial reduction of inspection time
• Quickly create quality certification reports that are precise, complete, meaningful, and statistically sound. Save labor and time using automatic compilation of in-process data
• Use excellent software capabilities to discover and quantify CMM’s systematic and random measurement errors. Achieve high-level confidence in data accuracy and precision
• Get automatic decisions on accuracy and timeliness of tool offsets and tool changes. Reduce stoppage time via elimination of unnecessary process adjustments
• Use CMM data for assessment of cumulative capability of CNC machine, tooling, and fixtures. MICRONITE creates a clear guide to process improvement and engineering problem solving
• Gather all the right data related to CMM effectiveness from across the entire process and production cycle. Reduce time losses
• Implement a quality-focused, cross-disciplinary CMM-based strategy that provides optimization of machining cycle time
• Make the most from reduction of CMM acceptance errors of Type I (Producer’s risk – the chance of rejecting an acceptable lot) and Type II (Consumer’s risk – the chance of accepting a defective lot). That means reduced costs and happier, more profitable customers

