The Issue
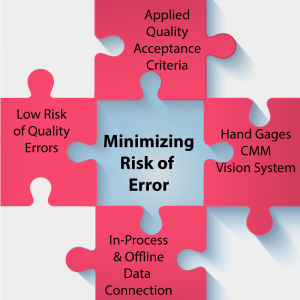
Machine shops are faced with a balancing act between the amount of inspection and the risk of quality acceptance of errors. The issue is how to reduce the risk of acceptance errors for the purpose of protection of both producers and consumers against wrongful decisions. The metalworking industry still functions at a low level of data reliability. It does not possess statistical measures which can reliably certify conformance to specification unless 100% inspection is completed. The traditional statistical basis of quality systems begins to appear archaic in the close-tolerance environment. Analytical capabilities of the process control (SPC) remain in the stagnant state, other generic methods such as R&R, APQP, and c=0 (MIL-STD-105E) do not meet demands of continuously tightening requirements of machining and grinding.
For quality acceptance purposes, the industry is operating on computation of indexes Cpk and Ppk. Calculation for Sigma requires the process to be in a state of statistical control. If not in control, calculation of Sigma (and hence Cpk) is useless – it is only valid when a process is in statistical control. The existing methodology of direct computation of risks of errors Type I (the chance of rejecting an acceptable lot, producer’s risk) and Type II (the chance of accepting a defective lot, consumer’s risk) is based on null hypothesis. The validity of this method depends on normality of distribution for the observed data. Obviously, the hypothesis applied to random sampling has rarely been tested in the manufacturing process. In reality, producers are limited with methods which manifest in failure to provide sufficient reliability of quality data, to control of complex processes, and to ensure error-proof product certification.
Majority of the managers and executives are reluctant to change the status quo on both sides of the product acceptance. Consumers demand adherence to core quality tools including demand for values of Cpk over 1.33. In many cases, achievement of Cpk over 1.33 for tolerances under 0.002” is possible only with “data doctoring”. Both sides face a significant dilemma: to turn a blind eye on shortcomings of the existent process and quality control methodology or pursue the new strategy of operation-specific process recognition and low-risk quality acceptance.
MICRONITE’s methodology of data  analysis dramatically reduces the risk of quality acceptance errors
The Solution
The new strategy and software tools providing low-risk quality acceptance are offered by the knowledge-based system MICRONITE. Predictive quality acceptance models prevent non-conforming at the point of production. Automated acceptance decisions for random inspection by variables bring long-awaited low risk of quality acceptance errors for receiving and final inspection. As a result, differentiation between risks of Type I and Type II errors is erased. Producers and consumers are equally protected against wrongful decisions.
Acceptance certificates are automatically compiled by computation of distributional and non-distributional parameters. The software can handle complex calculations very quickly and store large volumes of results so the user can investigate risk information in real-time. Machining-oriented modernization of core quality tools is absolutely necessary for achievement of well-informed decisions. MICRONITE helps strike the right balance between reliability of quality acceptance and low-level inspection expenses. Surely, it will satisfy managers and executives on both producing and receiving sides of product quality assessment. Millions of dollars will be saved.
Contradictions and controversies in process and product evaluation by Cpk
- You can use a capability analysis to determine whether a process is capable of producing output that meets customer requirements, when the process is in statistical control. The question is: when a machining process is running in a state of statistical control? The answer is: almost never.
- It is beneficial to use Cpk for processes that conform to the normal (bell curve) distribution. The central limit theorem, the basis for Cpk and control charts says that, if we take a big enough sample, the sample averages will follow a normal distribution no matter what the individual measurements do. Normal distribution assures minimum error of Cpk value.
- Commonly, the user is unaware of computation method for sigma estimate and its effect on the value of capability indexes. Difference in computational method has a huge effect on the value of Cpk.
- Part measurements that reflect non-linear unidirectional nature of machining process do not fall under assumption of the central limit theorem and can carry a big error of CP/Cpk value. It’s easy to understate or overstate the process capability. Raw data can be misinterpreted to get a phony Cpk.
- Cpk fails to account for useful process shift from proximity to spec limit to the nominal when the value of Cpk is fallen instead of improving. This situation is typical for any machining operation
- Cpk is independent of the target, e.g. it fails to account for process shift with symmetric tolerances and presents an even greater problem with asymmetric tolerances
- In-process adjustments and tool changes can distort capability assessment by Cpk and Ppk because each individual process has its own distribution pattern
- Capability index Cpk is not lessened if individual measurements, not averages, are out of specification, We cannot use capability indexes for product certification unless we do not take in consideration the individual measurements and sample size.
- Lot Cpk of 1.33 could be hiding a whole lot of poor capability values, offset by some very high values, leading to a false sense of compliance with target performance
- Sufficiency of sample size is not one of acceptance criteria for certification by Ppk. It leads to high risk of acceptance errors.
- Substantial errors in computation of Indexes Cpk and Ppk are expected for small batch sizes


